
If you’ve ever struggled to find the right image or wanted something original without hiring a full design team, Adobe Firefly might be exactly what you need. It’s Adobe Firefly’s AI art generator that lets you create stunning visuals from just a simple text prompt.
When I first heard about Firefly, I was curious but a bit skeptical. Can AI really generate artwork that’s usable for branding or creative projects? Turns out, yes — and it’s way more intuitive than I expected.
This step-by-step guide will show you how to use Adobe Firefly to create AI-generated artwork, no fancy tools or design skills needed.
Whether you’re designing for a social campaign, product mockup, or just experimenting with new ideas, here’s exactly how I use Firefly to bring creative visuals to life.
Step-by-Step: How to Use Adobe Firefly to Create AI Art
This step-by-step guide will show you how to use Adobe Firefly to turn your ideas into AI-generated visuals, no fancy tools or design skills needed.
Step 1: Open Adobe Firefly and Sign In
Go to firefly.adobe.com.
You’ll need to sign in with your Adobe account — if you don’t have one yet, you can create it for free.
Once you’re logged in, you’ll land on the Firefly homepage where you can choose different features like Text to Image, Text Effects, Generative Fill, and more. For this article, I’ll focus on Text to Image — my favorite starting point.
Step 2: Choose “Text to Image”
Click the Text to Image option from the Adobe Firefly homepage, and you’ll be taken to a clean, beginner-friendly interface. Right at the top, you’ll see a large prompt bar — this is where the magic begins. This feature is at the heart of Adobe Firefly’s AI art generator, and it’s surprisingly intuitive.
Think of the prompt bar like a conversation with the AI. You tell it what you want to see, and the generator brings your words to life. The more detailed and vivid your description, the more accurate and creative your results will be.
Let’s take a simple example. I typed:
“A dreamy sunset over rolling hills, soft painterly style, pastel tones”
In just a few seconds, Adobe Firefly generated four high-quality images that visually interpreted that prompt. Each version had its own unique artistic take — one leaned more abstract, another had realistic lighting, and the rest played with color and texture in unexpected ways. I ended up choosing the one that best captured the mood I was aiming for: soft, warm, and dreamlike.
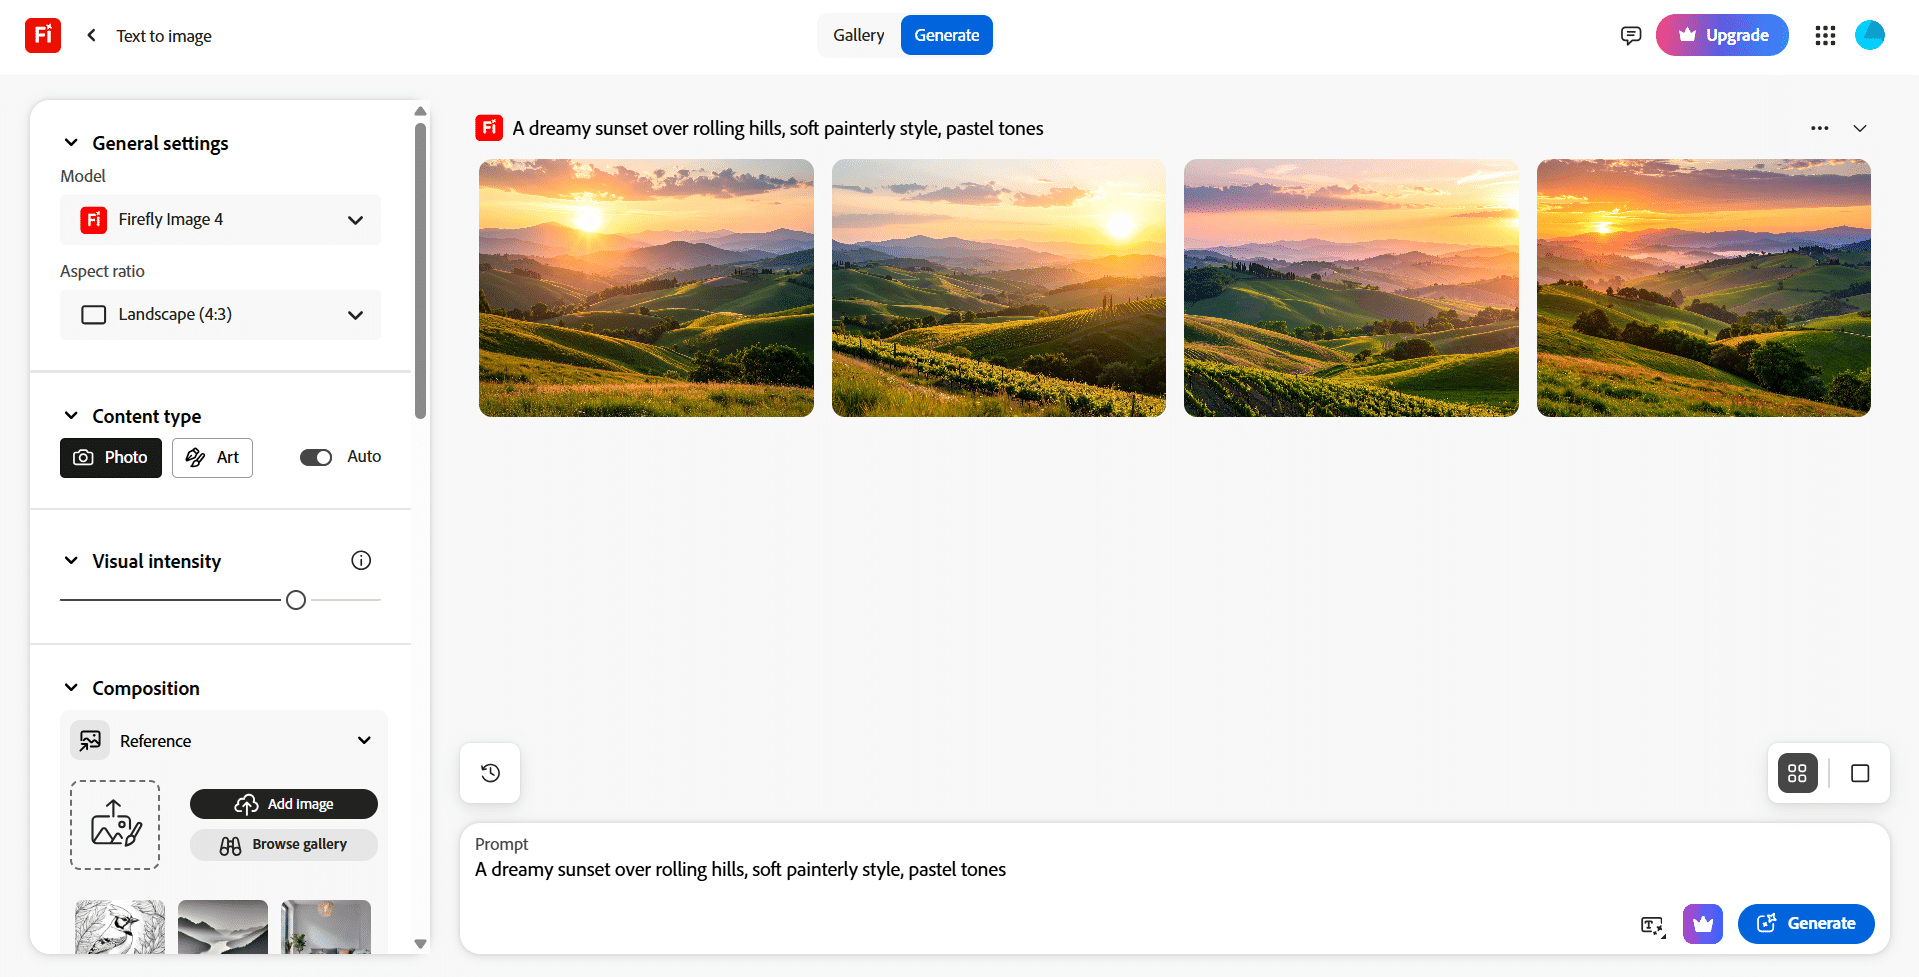
The Text to Image feature in Adobe Firefly is perfect for creators who want fast, high-quality visuals without starting from scratch.
Step 3: Adjust Style, Content, and Color Settings
On the right-hand panel, you’ll see customization settings. This part makes the Adobe Firefly AI art generator really powerful for customizing visuals to match your project’s tone.
- Content Type: Choose between photo, art, or graphic styles.
- Style: Pick from options like watercolor, cyberpunk, 3D, vector, and more.
- Color and Tone: Want something in warm neutrals or bold primary colors? Adjust it here.
- Aspect Ratio: Useful if you’re creating a banner, post, or story-sized layout.
I played around with a few combinations — switching from a 3D look to a watercolor style gave me totally different results, even with the same prompt.
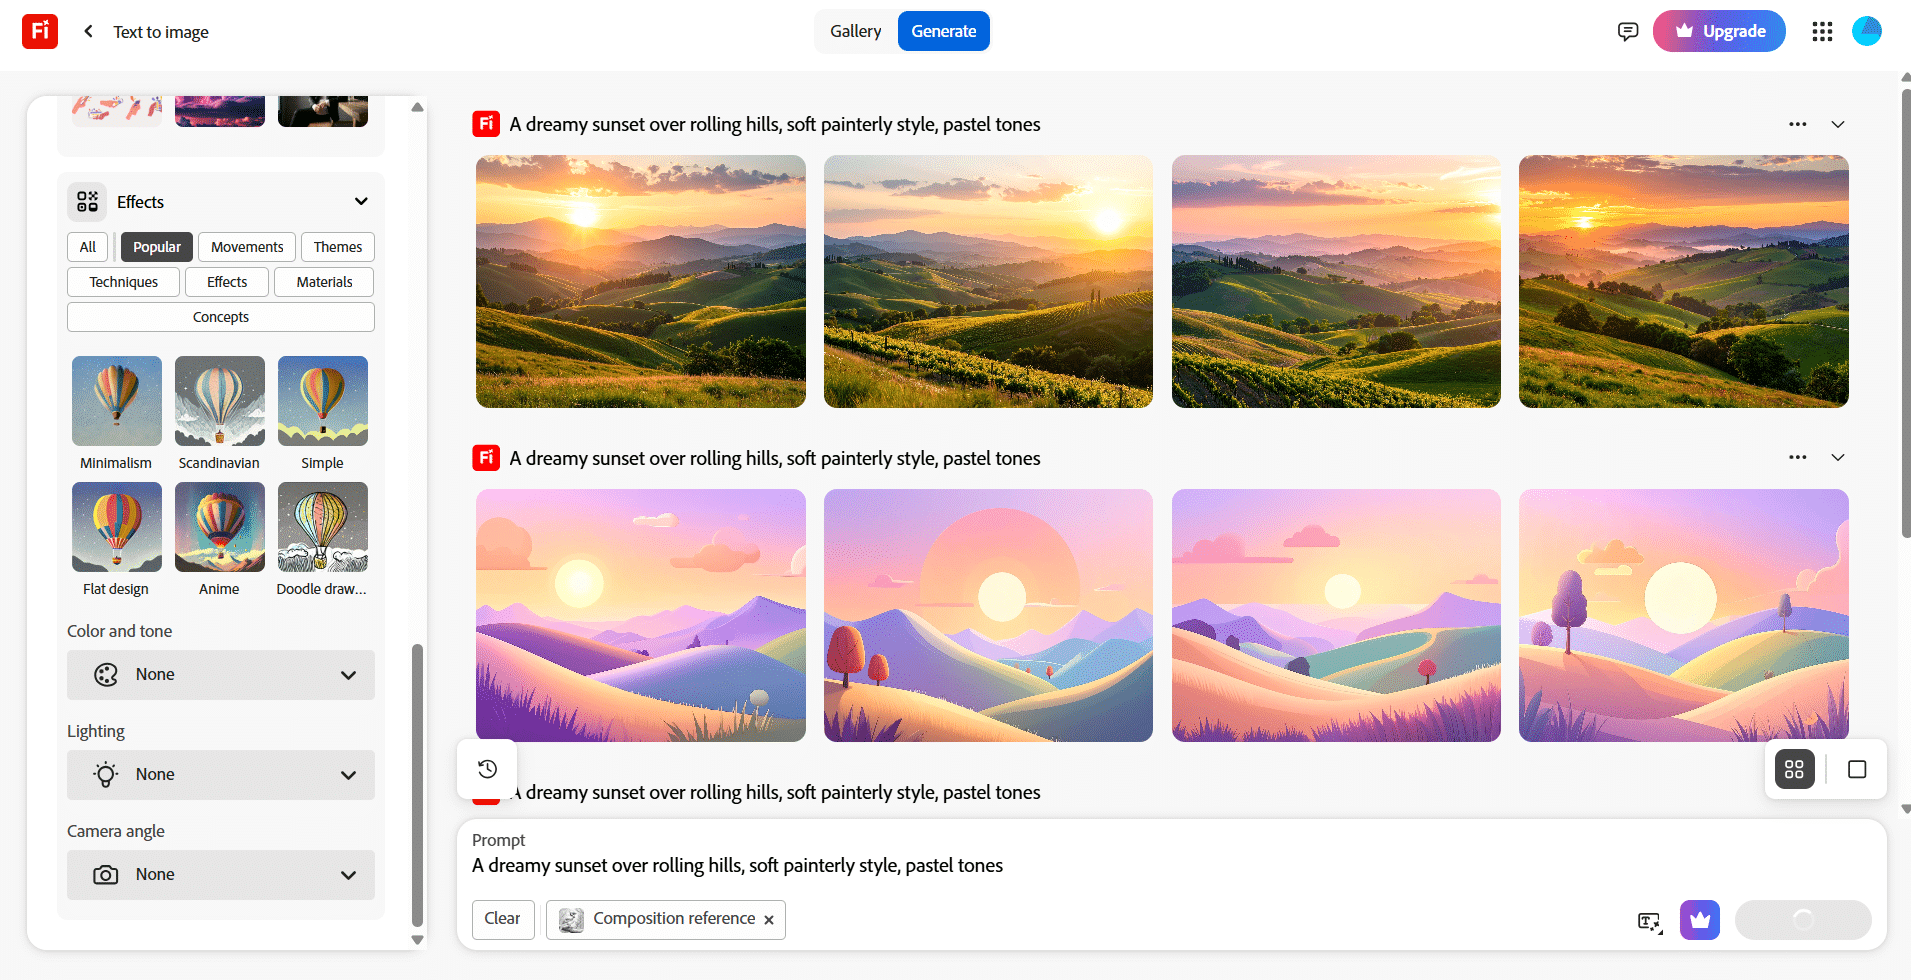
You can regenerate as many times as needed until you find the right one. These are the best Adobe Firefly settings for images if you’re aiming for brand consistency.
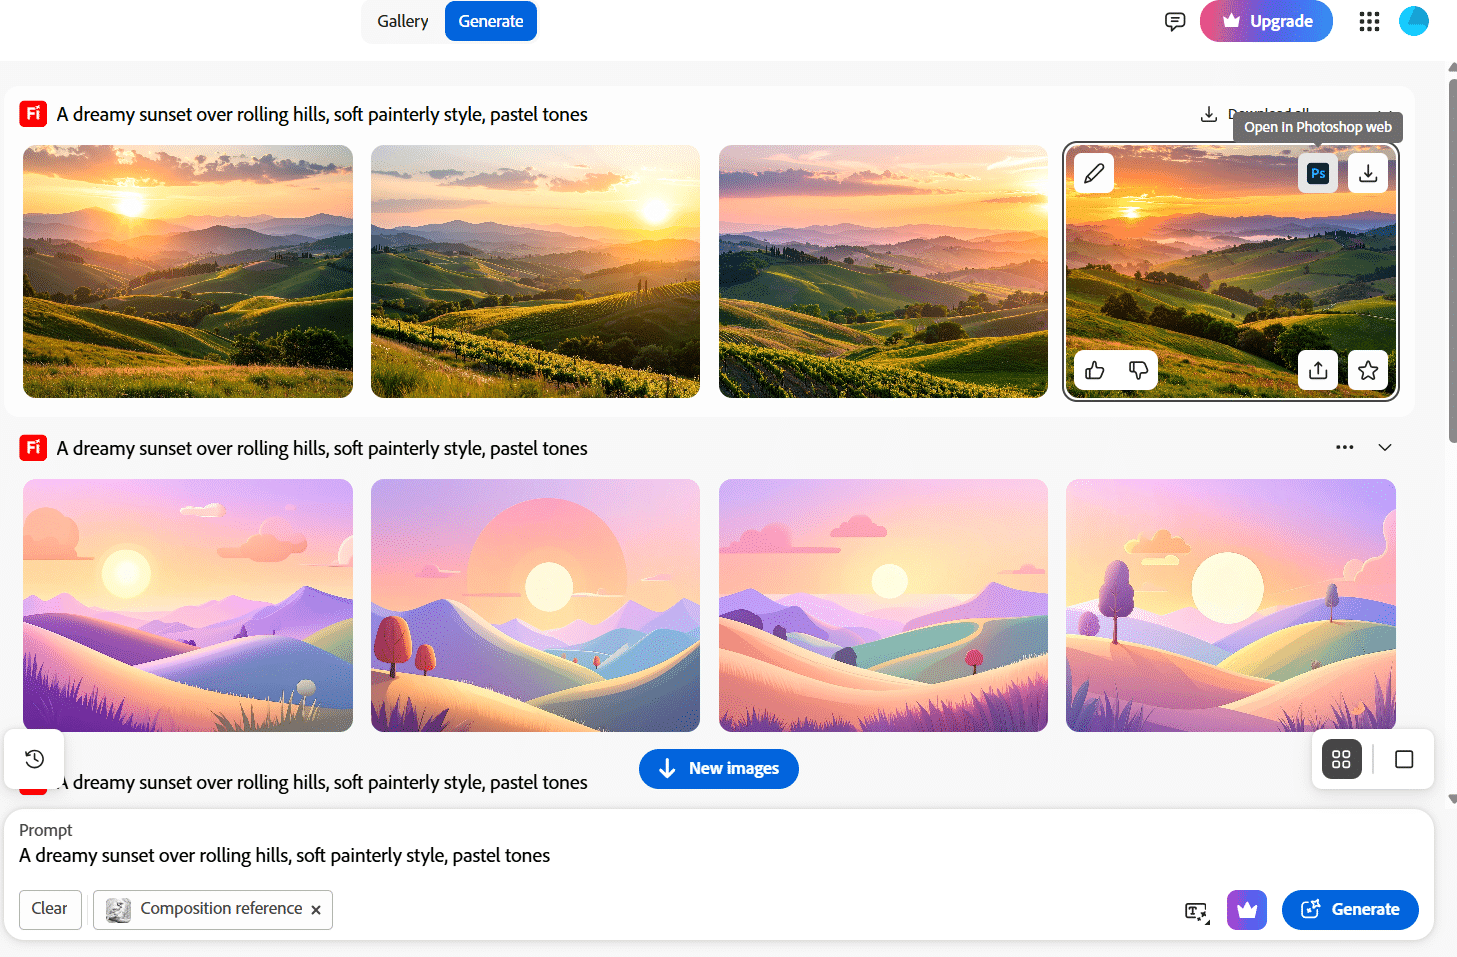
Step 4: Download Your Artwork
Once you’re satisfied with the image generated by Adobe Firefly, it’s time to download your artwork. Just click the Download button at the top-right corner of the screen. The current available format is JPG, which works well for web content, presentations, social media posts, and quick design needs.
Even though there’s no PNG option directly from the Text to Image tool, the JPG files Firefly produces are still high quality and visually sharp. If you need a transparent background or a higher-resolution format later, you can always open the image in Adobe Photoshop or Adobe Express to convert or edit it further.
Now, if you’re building a visual series — like for a campaign or content calendar — don’t stop at just one download. Save multiple versions of your artwork. I usually create a folder with different styles, crops, or moods generated from the same or slightly tweaked prompts. That way, I have backup visuals ready to go, which is especially useful when deadlines are tight.
Step 5 (Optional): Use It in Adobe Express or Photoshop
Here’s where things get cool: If you’re already working in Adobe Express you can drop your Firefly artwork directly into your design.
It also works well with Photoshop’s Generative Fill and is ideal for using Adobe Firefly with Photoshop when editing or enhancing AI-generated images, so you can expand, edit, or add more elements to the image later.
A Few Tips That Helped Me:
- Be Descriptive: The more details you add to your prompt (like lighting, mood, style), the better the output. Start simple, then add layers of detail.
- Use Style Combinations: Try mixing styles like “line art” with “vintage photo” — Firefly can blend them in surprising ways.
- Try Prompts in Your Brand Tone: If your brand is playful, try prompts like “quirky illustrated dog with sunglasses.” If it’s more serious, go with “elegant flat lay with muted colors.”
- Regenerate Until It Clicks: Don’t settle for the first image if it’s not what you envisioned. Click “Generate” again and tweak the prompt slightly — small changes make a big difference.
Why I’d Keep Using Firefly
What really won me over was the speed and originality. I didn’t have to scroll through endless stock image sites hoping to find something that kinda worked. Firefly let me describe exactly what I wanted, and it gave me fresh, editable visuals in seconds.
For marketers, brand designers, content creators — this is a game changer. You’re not stuck choosing between basic stock or expensive custom art. Now you can generate something that fits your message and looks on-brand, fast.
Final Thoughts
Adobe Firefly isn’t just a fun experiment — it’s a powerful design tool that deserves a spot in your creative workflow. Whether you’re a content creator working on daily posts, a marketer building campaign visuals, or a small business owner who wants fresh content without hiring a designer, Firefly helps you create high-quality, original images in just minutes.
What makes it stand out is how it combines ease of use with professional-looking results. You don’t need design experience or expensive software to generate visuals that are on-brand and visually appealing. With just a few descriptive words, you can produce artwork that aligns with your ideas, mood, and style. That’s a game-changer — especially for people who need to move fast and stay consistent across platforms.
It’s also worth noting that Adobe Firefly for social media is a huge time-saver. Instead of browsing stock photo sites or spending hours tweaking Canva templates, you can quickly generate images that are unique and tailored to your brand tone. Plus, you can easily bring your Firefly creations into Adobe Express or Photoshop if you want to layer text, add elements, or expand on the design.
If you’re still unsure whether it’s worth trying, consider this: what if you could eliminate creative blocks and produce visuals on demand? That’s exactly what Firefly offers. It gives you control, flexibility, and creative freedom — all in one browser-based platform.
Want to Try It Yourself?
Head over to firefly.adobe.com and start experimenting. You’ll be surprised how easy it is to bring your ideas to life with just a few words — no art degree or complicated tools needed.
For a broader overview of Firefly’s capabilities, including image generation and real-world use cases, don’t miss our in-depth Adobe Firefly Review.